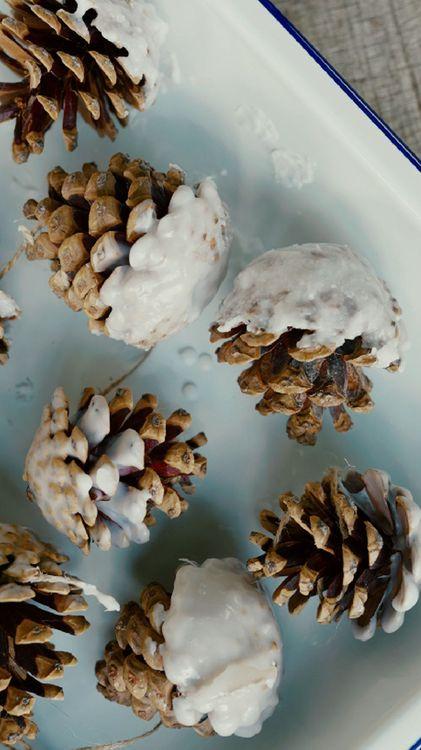
How to make a pinecone firelighter
Whether you’re making a bonfire for the beach (where it’s allowed), lighting a wintry fire in your home or starting up your firepit at one of our spaces – getting everything going is always the hardest part. And let’s face it, sometimes you want an easy win – so here’s how to do a spot of low effort foraging, a little arts and crafts and instantly put it to use. Let’s make pinecone firestarters!
Ingredients
Pinecones - everyone knows somewhere they’ve almost tripped to their death because of the abundance of pinecones. You might not even need to head to deep into the wild for this, if you’re pressed for time. Take the afternoon, get in a wild wander, and scoop up these little treasures as you go, being mindful of the natural world around you.
Candlewick - this will help the pinecones ignite! You’ll be wanting unwaxed cotton wick from a spool, and the bright side is, if you invest in a little roll of it, you’ll be ready the next time you spy a pile of pinecones or can even use it in other projects like candle making.
Soy wax - this will be used to make sure the pinecones burn well, and soy’s key to use here as it’s natural and doesn’t emit fragrances or toxic carcinogens as it burns.
Equipment
Make sure you have all of these before you get cracking, or you might find yourself disappointed!
- Saucepan: for the water bath
- Large glass measuring jug/bowl: For melting the wax
- A spoon: for stirring the wax, and applying it
- Scissors: to trim the wick
- Baking paper, baking tray & foil: to dry the pinecones on
Method
- Any time you bring anything from outdoors indoors, there’s a good chance something’s living in it. If you can, remove any wee creatures on it as best you can with an old toothbrush and then – bake the pinecones on foil in the oven for 90 minutes on 200F, then leave to cool.
- Grab a piece of wick and start by making a little loop to tie around the lowest, and largest set of protrusions at the bottom of the pinecone. Then begin wrapping it and weaving the wick upwards through its structure. When you get to the top, tie it off again, leaving an inch or so to light.
- Add your wax in the glass measuring jug or bowl and fill the large saucepan with about an inch of water and bring it to a mild simmer over medium to low heat. Gently add the bowl or measuring jug, lowering gently to avoid the hot water! This is like melting chocolate in a bain-marie, so stir occasionally until melted. Reduce the heat to the lowest possible setting, making sure it stays melted.
- Now dip your pinecones into the wax! If you’re going to be using them outside, then you can probably fully coat them, but if you expect to use them indoors, perhaps use a little less, as wax burns very intensely on wood. If your melting pot isn’t very deep, you can always spoon it over to help.
- Pop the pinecones on the baking tray lined with baking paper and let them cool and set. This will likely take about 15-20 minutes, which is enough time to reflect on how handy and crafty you are and drag other people in from the rest of the house to admire and praise them.
- Once dried, if they’re looking a little thin, you can go for a second coat, by repeating steps 4 & 5 again.
- If ready, it’s time to shorten that protruding wick to around a half inch.
- They’re ready to go! As they’ve been cleaned and prepped, they should be fine to store as is, perhaps in a pretty bundle by the fire – or packed and ready to go to one of our spaces!


